Batch Processing
Introduction
This article will discuss a way to apply one or more processes to a set of images automatically, called batch processing. This technique is useful in cases where you need to run the same process or processes on a number of images. The general idea is to make two containers: an ImageContainer which contains the images, and a ProcessContainer which contains the processes to apply to all the images.
ImageContainer
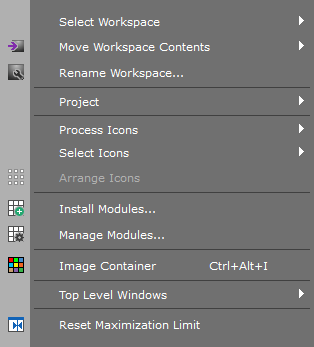
The ImageContainer allows you to group the files to be processed. To create an image container, right click on a free place of the workspace and select the option Image Container from the context menu, or utilize the shortcut CTRL+ALT+I.
An ImageContainer dialog provides a place to add the files to be processed and to set different parameters. The most important of these is the target path for new files to be created and the new name of the files, including the extension.
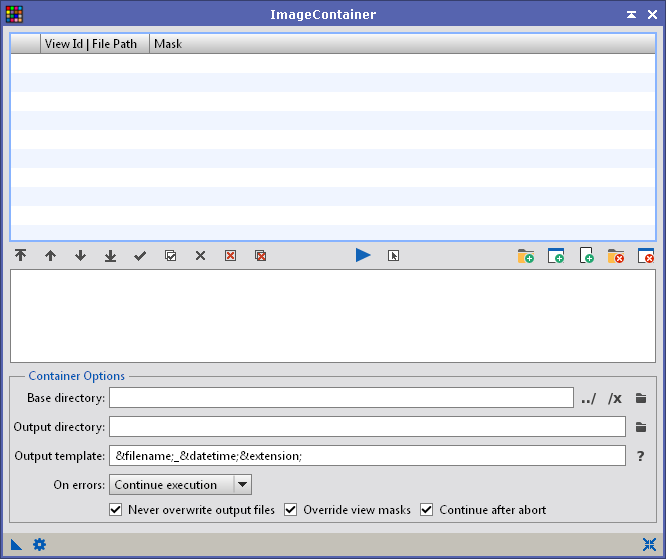
Configuration step by step:
- Click on the button Add Files
 to add the files you want to be processed.
 - Under Container Options, select the Output directory for the images to be processed by clicking on the icon
 on the far right.
 - In the Output template field, set the format of the name and extension. You can keep the name of the source files by using the expression &filename;, or change it as you wish. To keep the same extension as the source files, use the expression &extension;. But if you want to save the files in another format, for example .fit, add .fit at the end of the field. A full list of available expressions can be seen by clicking on the ? button located to the right of the field. In our example we will use the following notation: &count;_&filename;.fit, which will simply add a prefix to number the files sequentially (&count;), followed by a separator character (_), then keep the original name (&filename;) and store the generated files in FITS (.fit) format.
- Optionally you can press the Run Diagnostics
 button to verify that all settings are correct.
 - Generate an instance icon by dragging and dropping the blue triangle located in the lower left corner of the Image Container dialog to an open area of the workspace (see video on how to generate an instance icon).
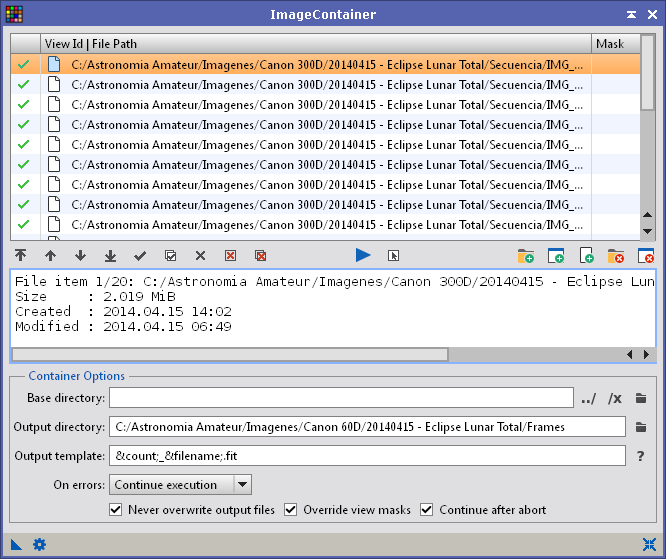
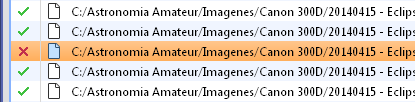
- If you want to omit one or several images from the list (for example for testing the procedure before running the whole lot) you can disable an image by double clicking on the green check mark next to the image name. It will become a red X, indicating that the image is deactivated and will not be processed.
The following video illustrates the simplified procedure:
ProcessContainer
Now you must prepare the set of processes that will be applied to all the images in the ImageContainer you just created. For this example we will assume that we want to resize and make an adjustment to the histogram on each image.
To begin, you can open one of the images involved (any of them) and apply each process that you want applied to the entire set of images. Most processes can be used with this type of batch processing.
Processing step by step:
- Open one of the images involved using CTRL + O, or by double clicking on a free area on the workspace to open the file explorer.
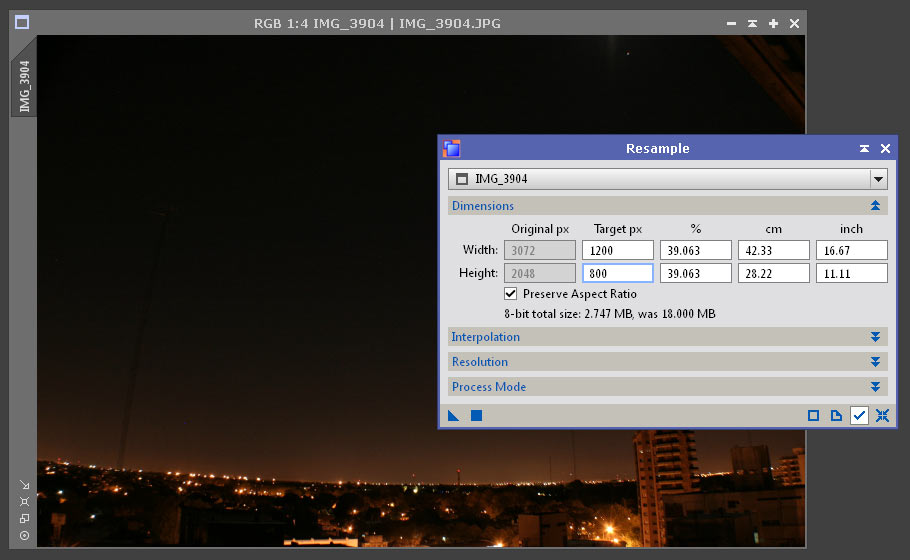
- For this example, resize the image using the process Resample (Process › Geometry › Resample)
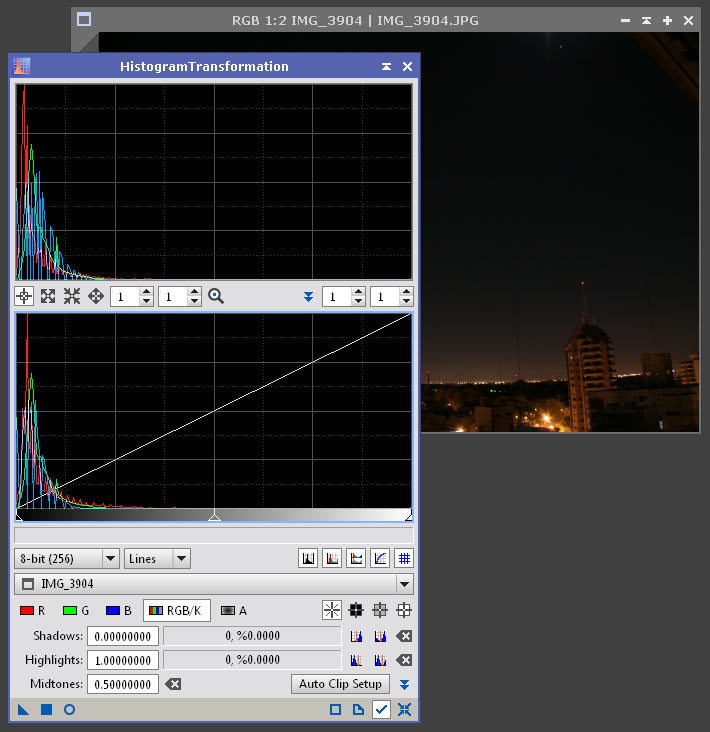
- Now perform a histogram adjustment using the HistogramTransformation tool:
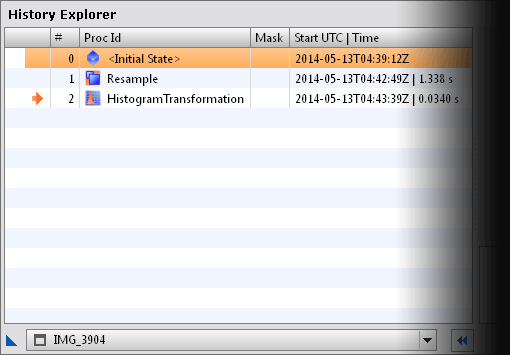
- Now that all the processes have been applied to the image, open the History Explorer window and select the image from the dropdown menu on the bottom to view the history of the image. If the History Explorer tab is not visible, enable it from the menu View › Explore Windows › History Explorer.
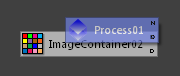
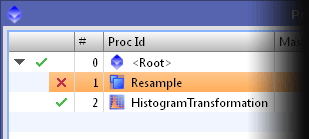
- From the History Explorer you can generate an instance icon of a ProcessContainer that contains all processes. To do this, drag and drop the blue triangle in the lower left corner of the History Explorer to a free area of the workspace. In the resulting icon all processes which have been applied to the image will be encapsulated (in this case two: Resample and HistogramTransformation). The following video shows the procedure:
- Having generated the ImageContainer and ProcessContainer instance icons, everything is ready for batch processing. Simply drag and drop the ProcessContainer icon onto the ImageContainer icon.
- If all went well, the processes encapsulated within the ProcessContainer will be applied to all images grouped within the ImageContainer, creating new files in the specified destination path and with the configured features. We can check this by opening the destination folder and checking the files.
If you want to skip the application of any of the processes encapsulated in ProcessContainer, you can open the container by double clicking on its icon and disabling any process by double clicking on the green check mark to the left of the process name. The green check will become a red X, indicating that the process is deactivated and will not be applied. Once this is done, you must generate a new instance icon for the ProcessContainer by dragging the blue triangle of the open container to either a free area of the workspace or onto the original ProcessContainer icon.
Most processes can be encapsulated into a ProcessContainer like this and be applied to an ImageContainer as described. This feature is extremely useful when repetitive processes must be applied to a large number of images, greatly simplifying the task.